How do I use the Gemini Preset option?
The Gemini Preset file allows a quick and convenient method of changing a hosts IP and E.D.H values using a pre-defined settings text file. As an example, if the system consists of five Gemini hosts, each host will have a unique IP and E.D.H. address. If a spare host is to be deployed in place of, for example host 2, using the Preset option it is possible to load the correct IP and E.D.H values for the host so the spare can be easily swapped with the currently deployed host 2.
Best practice is to edit and load the Preset file to all Gemini hosts in advance.
The following example below shows a typical text file for the Gemini Preset option.
The .txt file is the Preset configuration file for the Gemini host. To apply this file the following steps are required.
Step-by-step guide.
- Copy the Preset text below to Notepad, edit the IP and E.D.H. text to match the configuration settings on your system. Save the ‘preset.txt’ file to the C:\trilogy\Presets\ folder on the PC running the Gateway Configuration Editor and Database Supervisor.
- Browse to the Gemini host and go to the Admin > Settings page. A log in is required for the settings page, the default log in password is ‘trilogy’.
- Next choose the Admin > Settings > System Preset option.
- From the Preset form browse to the file edited in step 1.
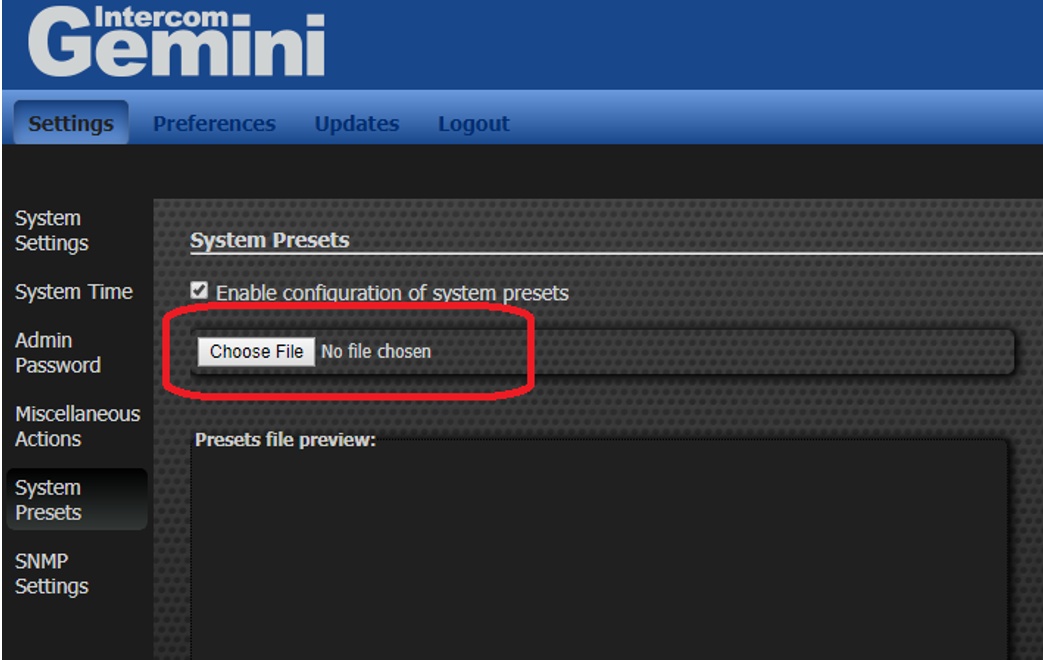
5. Once the text file has loaded, the ‘Presets file preview’ screen will now show the text file.

6. Click “Apply” to load the Presets to the Gemini.

To action the Preset on the Gemini this has to be loaded via the Gemini front panel using the following steps.
1. From the Gemini front panel, select Admin > Login. The default log in password is ‘trilogy’.
2. Choose the Preset option on the front panel.
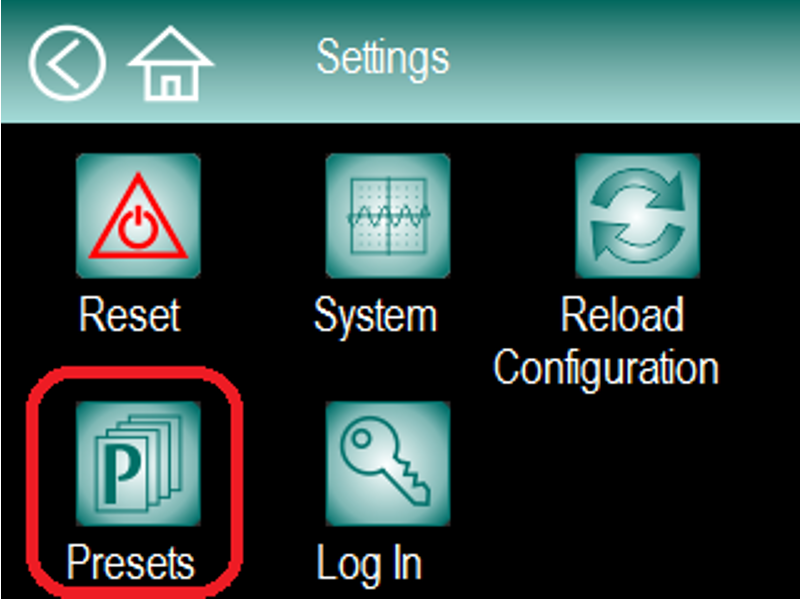
3. Select either Preset number to select the host profile you wish to apply.

4. Press the tick to confirm the selection and the tick again to reboot the Gemini with the new profile.

5. From the Gateway Editor, open the ‘Active Clients’ form.

6. Right click on the Gemini host to which you have just assigned the new profile. Choose ‘Upload’ to send the configuration file to this host and restart when prompted.
7. As an alternative to steps 5 & 6, you can reload the correct configuration via the Gemini web browser Admin > Settings > Miscellaneous Actions > select ‘Configuration Reload’

Preset example:
# ==================================================
#
# Description of system presets ini file fields
#
#[SystemPreset] System preset section header
#SPCT=2 Number of system presets defined in this ini file
#
#[SP00] Preset section header range is from SP00 to SPXX
# If SPCT is equal to 2 XX = 01 (i.e SPCT-1=XX)
#
#EDHS=0.1.1 EDHS value for system preset
#
#HOST=Castor Hostname for system preset - must adhere to hostname validity.
# Valid characters are (a-z, A-Z, 0-9, -, _) - no spaces or
# other characters allowed
#
#PDSC=WAN Ground Floor System preset description or tag
# Valid characters as for host but spaces and other characters
# should be allowed
#
#IPAD=172.30.55.220 IP Address of Gemini host
#
#SBNT=255.255.255.0 Subnet mask
#
#GTWY=172.30.55.1 Default gateway - can be left undefined or 0.0.0.0
#
#SDNS=172.30.55.201 Domain name server - can be left undefined or 0.0.0.0
#
#DBSL=172.30.55.200 Database server IP address
#
# ==================================================
[SystemPreset]
SPCT=2
[SP00]
Related articles
Copyright, Trilogy Communications.
---------------
The information on this page is owned by Clear-Com and constitutes Clear-Com’s confidential and proprietary information, may be used solely for purposes related to the furtherance of Clear-Com’ business and shall not be disclosed, distributed, copied or disseminated without Clear-Com’s prior written consent.