- Unbox the GPS PTP Time Server and place antenna near a window with visibility of the sky.
- Power on and ensure the Green POW LED lights.
- Wait until the Orange LOCK LED is solid and the SEC (seconds) indicator is flashing 1Hz. Check the antenna connection and GPS placement if no LOCK is seen.
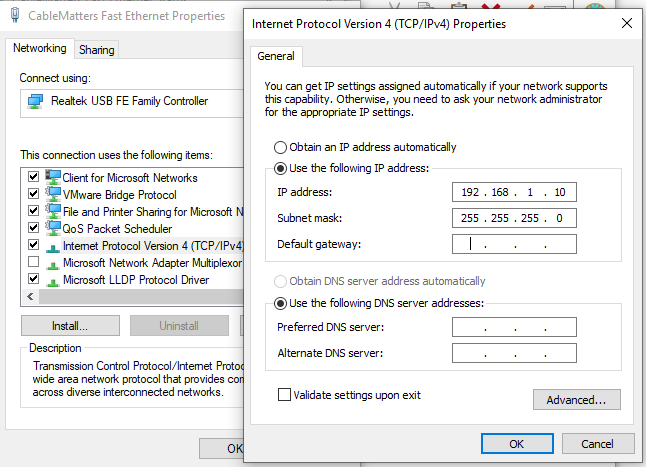
- Connect LAN to the NETWORK connector (RJ45/8P8C). Set the PC's LAN to 192.168.1.10:
- Sign in as username: admin, password tmachine:

- Click on the About tab. If the version is earlier than 0.3.4, download a later version from https://timemachinescorp.com or https://clearcom.ftpstream.com/50396/b6d6b496ccf652eece197f897a0cbd3e/AE/Erik/fw_update_ptp_v0.3.4ceta.img

To update, go to Update, and choose the extracted firmware file:
The device will very quickly update and then take about five minutes of flashing LEDs and no web or ping activity then restart - the unit straight from the factory started pinging again, showed LOCK, then lost ping and then came back. If possible, make sure the file upload state goes to 100% and leave the unit for seven minutes. On your return, the SEC indicator should be flashing again.
Go back to About to verify the version has increased. - Go to the PTP Config tab and change Unicast to Multicast:


Change:
Priority 1 and 2 to a number less than 127.
Post-Holdover Behavior to Update Clock Class to 52
Log Announce Interval to 1
Log Sync Interval to -1
Log Min Delay Request Interval to 0
Log Min PDelay Request Interval to 2
Submit changes - We will not be using NTP so go to NTP Config and select Stop, then Submit:

- Set the IP address as needed on the System Settings tab:

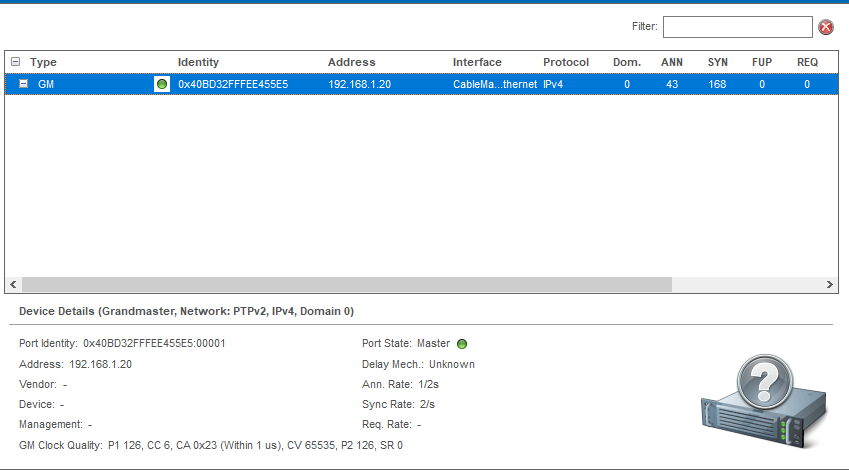
- Verify that devices have clocked to this unit by using PTP TrackHound or EHX > Monitoring > select IPT > check the address of Master ID. This unit will have a MAC that starts with 40-BD-32. Clear-Com devices begin 00-0E-98.